La-crosse-technology WS-9029U User Manual
Browse online or download User Manual for Control panel La-crosse-technology WS-9029U. La Crosse Technology WS-9029U User Manual
- Page / 11
- Table of contents
- BOOKMARKS
- WS-9029U 1
- 915 MHz 1
- WIRELESS WEATHER STATION 1
- CONTENTS 2
- FIGURE 1 3
- FIGURE 2 4
- Sensor signal 5
Summary of Contents
WS-9029U 915 MHz WIRELESS WEATHER STATION INSTRUCTION MANUAL
10 MAINTENANCE AND CARE INSTRUCTIONS 9 Extreme temperatures, vibration, and shock should be avoided to prevent damage to the units. 9 Clean display
11surface; (4) damage resulting from failure to follow instructions contained in your owner’s manual; (5) damage resulting from the performance of re
2 CONTENTS 03 introduction 03 features 04 quick set up guide 05 detailed set up guide 06 function keys 06 operations 08 mounting 09
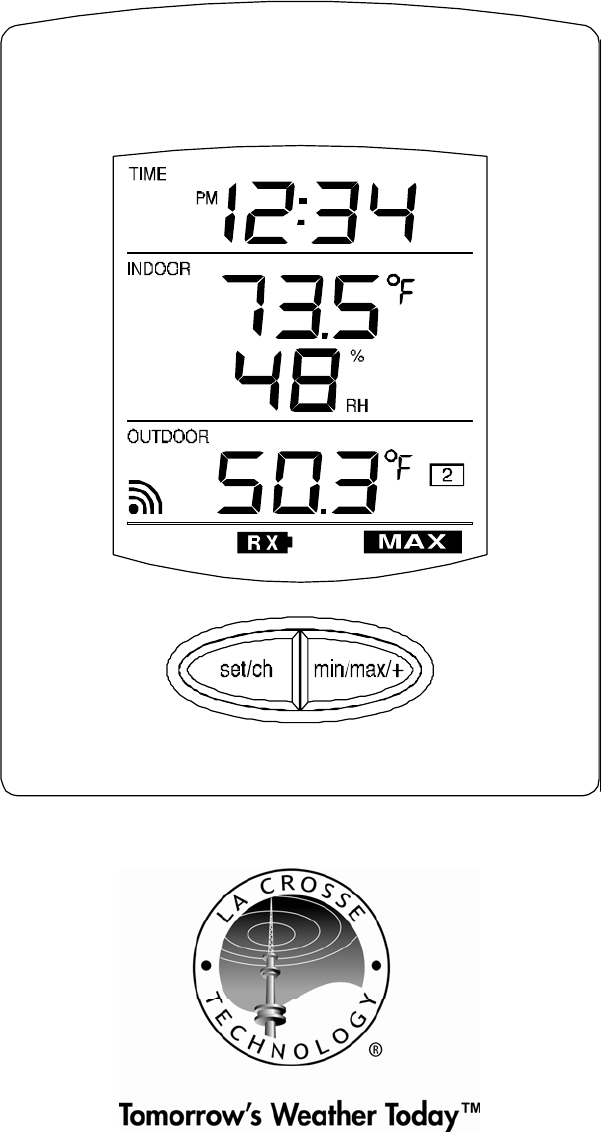
3 FEATURES • Wireless Weather Station (Figure 1). • Remote Temperature Sensor with optional Channel 2 P
4• Wall Hanging or Free Standing. ADDITIONAL EQUIPMENT (not included) 1. Two fresh AA 1.5V alkaline batteries for the wireless
5DETAILED SETUP GUIDE I. BATTERY INSTALLATION (When one Temperature sensor is being used) 1. First, insert the batteries to the Temperature sensor
6* When the signal is successfully received by the Weather Station, the icon will be switched on. (If not successful, the icon will not be shown in L
7To view minimum and maximum temperatures: press the min/max/+ button once. “MIN” appears in the bottom left of the LCD. The indoor and outdoor tem
8NOTE: You must insert the batteries into the second sensor within 30 seconds of reception of the first sensor. 7. The outdoor temperature from the
9THE WIRELESS WEATHER STATION The wireless weather station can be mounted in 2 ways: • with the table stand or, • on the wall with the use of a wal
© 2020, manymanuals.com. All rights reserved. | 1.201 s |
 Manymanuals.com
 Manymanuals.de
 Manymanuals.fr
 Manymanuals.it
 Manymanuals.pl
 Manymanuals.cz
 Manymanuals.es
 Manymanuals-pt.com
Comments to this Manuals